

I pay $0.00 in hosting for this website
Web development: from then until now.
Written in April 17, 2021 - 🕒 11 min. readWhen I was in college, web development wasn’t a major part of programming as it is these days, I didn’t have a single class on the web, and now I work with it every day. Pretty crazy.
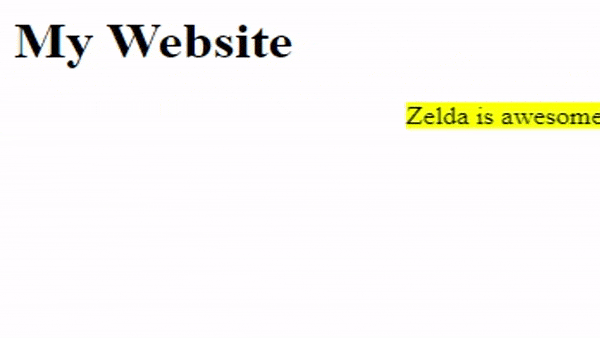
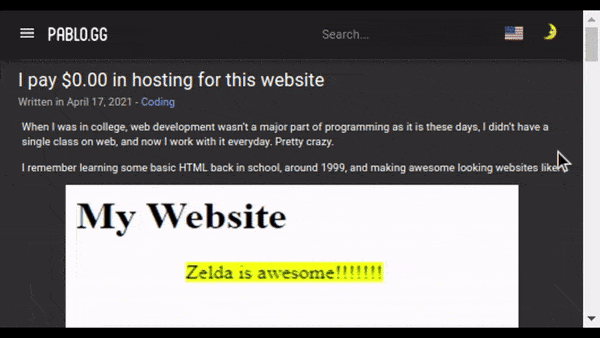
I remember learning some basic HTML back in school, around 1999, and making awesome looking websites like:
The old ways
Back in the old (Dreamweaver) days if I wanted to make a website, I would have something like this:
- website
  - index.html
  - about.html
  - contact.html
Then for each of those files, I would have to write the full HTML for that page, even if all of them had the same header or logo, etc. In this example, there is no database, no dynamic data, no compilation, the website is 100% static, I can simply open these files in my browser locally and everything will work without the need of servers because HTML is pretty much just a plain text with steroids.
Of course, this is far from ideal, so other solutions like PHP came in to allow us to make things a bit more dynamic.
Not that old ways
With PHP, I can split my HTML template into re-usable chunks, so I could easily boot up a WordPress website and set up the whole header layout, and then focus only on creating the content for the website.
The problem is that my browser doesn’t understand PHP, so I need a server to convert all the PHP logic into static HTML, so every time someone requested to see a page on my website, the request would go to my server, which will process the PHP code and serve an HTML page and of course, this costs way more than simply serving static HTML files.
A PHP website file structure would have something like this:
- website
      - index.php
      - header.php
      - footer.php
  - content
      - home.php
      - about.php
      - contact.php
This is where most of the websites are now, and with a good reason, Web 2.0 is complex and dynamics is needed… for most cases at least, but what about sites that barely change like blogs or portfolios?
The new way - JAMStack
JAMStack stands for JavaScript, API & Markup - Stack and it’s here to bring the best of the old ways into our lives. With JAMStack I can create my website the same way I’d do it using PHP, but instead of having the data processed on every request, I can code my whole website, pre-compile it once, and then serve it as static HTML + JavaScript files. This is super useful for websites like this one, and this technique is nothing new, all our desktop apps are pre-compiled and served “statically” - let’s forget about SaaS for a second ok?
For example on this website, I have a template for a blog post page, and then I fill this template with data from a Markdown file. This file structure is something like this:
- website
      - index.html
  - pages
      - home.html
      - contact.html
  - templates
      - blog-posts.html
  - content
      - my-first-post.md
      - my-second-post.md
I’m using Gatsby to make this website, so I can write everything using React components, and the Gatsby framework compiles everything into a bunch of HTML files that are served to the browser.
Where to start?
Before trying Gatsby, I started with Jekyll, which was a way to create a JAMStack blog and deploy it for free on GitHub Pages, that’s all I needed, but first I had to convert all my posts from my 12 years old WordPress blog into Markdown files with frontmatter variables.
WordPress posts are (generally) stored in a database, so I need a way to pull these data and save it as a Markdown file, and the easiest way is to simply use a WordPress plugin, like wordpress-to-jekyll-exporter. If you don’t have access to your blog anymore, but still have your database.sql file (like me 😅) just boot up a local version of WordPress to exports your posts.
I also created a Python script to change some data from the generated Markdown files to fit some of my needs.
I had over 100 posts in my old blog, so it was a big surprise to me to know that there was no way to use a Jekyll pagination plugin v2 and automatically deploy it to GitHub Pages, so I decided to look for other solutions.
The Great Gatsby
Since I already know React, going with Gatsby was a no-brainer, and they have excellent documentation and lots of plugins and tutorials and with the release of GitHub Actions, it was possible to build and deploy Gatsby within the GitHub environment without having to use an external service like travis-ci.org. Not only that, but I could even have my source-code in a private repo and deploy it to a public repo, this way I can have draft posts without them being public in the codebase.
First I made this repo based on the instructions from this MUI repo. All it does is link together the Material UI React library into Gatsby.
The next step was getting the gatsby-material-ui-starter as a template to add all my blog logic, but first I needed a list of all the features I wanted in my blog, and those were:
- Home page with posts listing
- Blog page with posts listing
- Blog post page with related posts
- Archive page with pagination
- Comments section
- Contact page
- Albums page with photos from Google Photos
- Search
- NO SERVERS
Everything sounds pretty reasonable until you remember this all needs to be done with JAMStack and no servers. Is this even possible? Yes, it is. Gatsby and React are really powerful tools.
Posts listing and related posts
Gatsby gives me a simple GraphQL API to get data from my Markdown files, and this can be done easily using the gatsby-transformer-remark plugin, so then I can query my posts with:
export const pageQuery = graphql`
    query Posts($locale: String) {
        allMarkdownRemark(
            filter: {
                fields: { locale: { eq: $locale } }
                frontmatter: { show: { eq: true } }
            }
            sort: { fields: [frontmatter___date], order: DESC }
        ) {
            edges {
                node {
                    excerpt
                    fields {
                        slug
                        path
                        locale
                    }
                    frontmatter {
                        date
                        title
                    }
                }
            }
        }
    }
`;
If you want to know more on how to create your own Gatsby blog from scratch, please follow their official tutorial on it.
For the related posts, I decided to get all my posts and check on each one of them which other posts had the most common tags with it, and then add the top 3 related posts to that post related posts, this might not be the most efficient way to do this, but remember that I’m only compiling the website once, so that’s ok 😊
Pagination
Material UI already has a pagination component, so I created an Archive.jsx template that takes a list of posts, a total pages number and the number of the current page, and then during the Gatsby compilation process I create a bunch of archive pages using my template and that’s it, easy!
Search
Since Gatsby uses super modern JavaScript technologies, creating a local search should be pretty easy, right? YES! There is even a plugin for it already! Noice!
Just follow this tutorial and combine the code with the Material UI autocomplete component to create a SearchBar component like the one in this blog.
Google Photos integration
The bad part about JAMStack is that my git repo will contain not only all my codebase, but also all my content data, including photos, etc, and this can get real big real fast.
Of course, I could consume my data from an external API instead of from Markdown files and this will already help a bit, but being able to not store photos in the repo will save a lot of space.
Thanks to this nice post by @ValentinHervieu we can get an idea on how to get the images URL from a Google Photos album URL, I can simply follow that post and add the code to my Gatsby building process.
Multi-languages
As Portuguese is my native language, and I live outside Brazil, it is useful to be able to write posts in multiple languages, to be able to share them with my friends here and in Brazil, and for that, I need to add functionality to be able to create posts in different languages, and obviously there is a Gatsby plugin for that.
This plugin is based on the famous React Intl, and is very simple to use, just add a new object in the Gatsby plugin settings to pass an array with the codes of the languages you want to add and a path to where the translations for those languages will be. See below how this object looks like for this blog:
module.exports = {
    ...config,
    plugins: [{
        resolve: 'gatsby-plugin-intl',
        options: {
            path: `${__dirname}/src/intl`,
            languages: ['en', 'pt-br'],
            defaultLanguage: 'en',
            redirect: true,
            redirectComponent: require.resolve('./src/utils/redirect.js'),
        },
    }],
};
What this will do is whenever you create a page like /contact/, it will create a new page for each of the languages that you configured it for, like /en/contact/ and /pt-br/contact/. Awesome. But what about blog posts? I don’t want to have paths like /en/hello-world/ and /pt-br/hello-world/, I want /en/hello-world/ and /pt-br/ola-mundo/.
To have the same blog post in different languages, I create markdown files like hello-world.en.md and hello-world.pt-br.md and then I link them by the post title and post date, this way I can switch the language in the blog post page, and then see that same post in another language.
Contact page and comments section
There are a couple of services that offer commenting systems to your website, like disqus.com and Facebook Comments, but Disqus’ free plan will add ads to your site, and Facebook will require users to have a Facebook account to use it.
After some research, I found out that it’s possible to use Google Forms as a commenting system for my JAMStack blog.
The comment data is stored in a Google Spreadsheet on your Google Drive, which can then be accessed in the Gatsby build process to pass all the comments to the appropriate blog posts.
One caveat of using this system is that if I want the new comments to show up in my blog, I need to rebuild everything again, but let’s think of that as a process to approve/disapprove comments 😄, but also if you configure everything properly, Gatsby rebuilds can be quite smart and cheap.
GitHub Actions
After all the coding and hacking, all that is left is to use GitHub Actions to build and deploy my website, and for that I simply create a .github/workflows/deploy.yml file in my GitHub repo with the following settings:
name: Deploy to GitHub Pages
on:
  workflow_dispatch:
  push:
    branches:
      - main

jobs:
  build-and-deploy:
    runs-on: ubuntu-latest
    steps:
      - name: Checkout
        uses: actions/checkout@v2.3.4
        with:
          persist-credentials: false

      - name: Install and Build 🚧
        run: |
          npm cache clean --force
          npm install
          npm run clean
          npm run build

      - name: Deploy 🚀
        uses: JamesIves/github-pages-deploy-action@4.1.1
        with:
          token: ${{ secrets.ACCESS_TOKEN }}
          repository-name: blopa/pablo.gg
          branch: gh-pages
          folder: public
          clean: true
          single-commit: true
This will build the website every time I push to the main branch and then deploy it to github.com/blopa/pablo.gg so it can be accessed via https://pablo.gg/.
Why
You might be wonder “why don’t you simply spin a $1.00 server and run WordPress?”, and I tell you why, it’s not only a case of saving money, but it’s also one thing less to care about, and if I die or get into a coma I don’t know, my website will still be only - as long as GitHub Pages is available and free. And by using JAMStack you will automatically decrease de processing power used to serve your website, which then will also decrease CO2 emission and save the planet (or at least help a bit).
Conclusion
Not only I learned a new React framework, but I also have a nice and light personal blog with $0.00 cost of hosting, and even if one day GitHub Actions and GitHub Pages go offline, I can still build my blog locally and deploy to any static hosting that would cost very little per year, so yay!
Of course, I end up paying for the .gg domain, but if you want to go full frugal you can simply host your website using free domains like github.io or freenom.com.
Tags:
- jamstack
- javascript
- gatsby
- reactjs
- github
- github pages
- github actions
- frugal
- multi-languages
- flexsearch
- google photos
- markdown
Related posts
Post a comment
Comments
Luca on 4/19/21
Cool. Big data 5 head brain. Love it.