Loading external tileset file on Phaser JS using Webpack - Skate Platformer Game Devlog #07
Written in October 8, 2020 - 🕒 4 min. read
In today's Game Devlog I will show you how to load external tilesets into Phaser JS, but first let's take this out of the way: Forget about "Skate Platformer", our game is going to be called Super Ollie vs Pebble Corp. We didn't really plan in naming the game now, but the idea simply popped into our heads and we think the name is perfect. Let me ask you this, what's the skater's worst enemy? Unarguably those small pebbles, right? What if in the future there's an evil company that wants to prohibit skateboarding everywhere, what would that company be called? Pebble Corp of course. Now with that out of the way, let's keep going with the post.
Loading external tileset files
Tiled is a powerful open source tool to build 2D maps supported by many different game engines, including Phaser JS, which is the framework I’m using for this game.
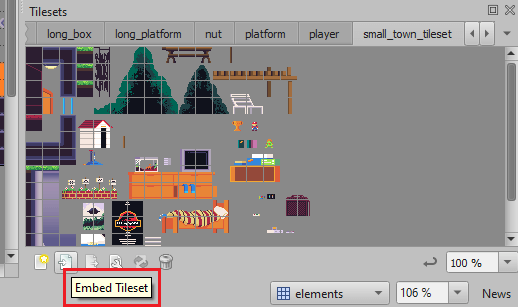
There is one small problem, when loading Tiled maps on Phaser JS, the tileset needs to be embedded into the map, otherwise Phaser JS can’t load it. This is quite frustrating because whenever you make changes to your tileset, you will have to go to all your map files and re-embed the tileset, this can be very time-consuming if you have multiple maps and tilesets.

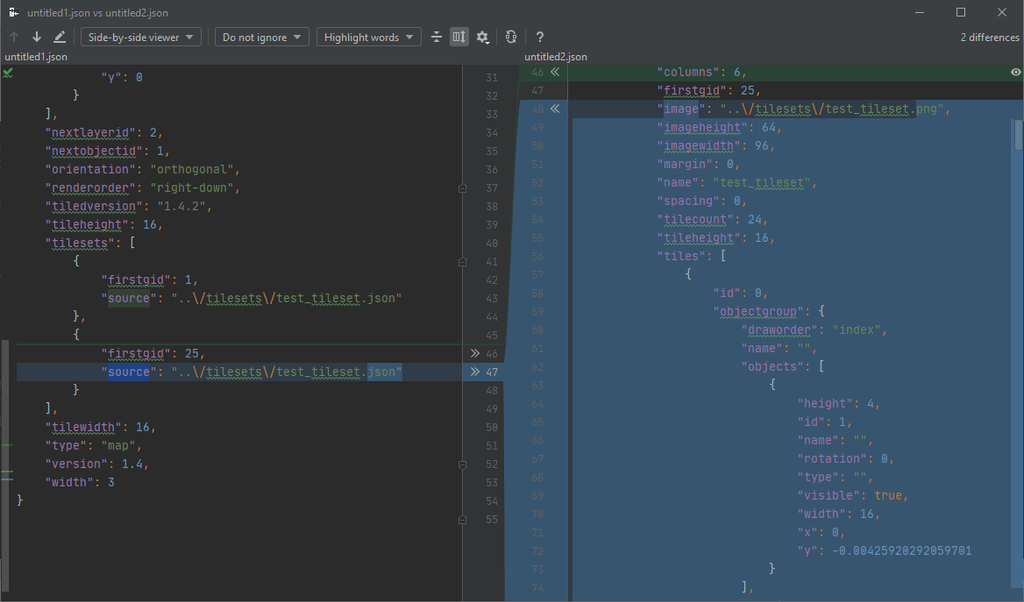
To solve this problem I decided to come up with a solution to automatically embed tilemaps using Webpack, to do that I compared the JSON file from the same map before and after embedding a tileset, and it looked like this:

As you can see, instead of having the property source to an external file, like "source": "../tilesets/test_tileset.json", it contains the whole content of that file plus a firstgid attribute, so all we need to do is loop through all Tiled maps, read the tilesets property, load each individual tileset file and put each of it’s content in a array replacement for the tilesets property.
This is how I did it:
const CopyWebpackPlugin = require('copy-webpack-plugin');
const { promises: fs } = require('fs');
const stageFiles = await fs.readdir(STAGES_PATH);
// get only the JSON files
const stageJsons = stageFiles
    .filter((stage) => stage.split('.')[1] === 'json');

const copyWebpackPluginPatterns = [];
stageJsons.forEach((stage) => {
    copyWebpackPluginPatterns.push({
        from: `${STAGES_PATH}/${stage}`,
        to: '../assets/stages',
        transform: (fileBuffer, elPath) => {
            const manifestString = fileBuffer.toString();
            const stageData = JSON.parse(manifestString);
            const newTilesets = stageData.tilesets.map((tileset) => {
                // firstgid is an important id reference for Tiled
                const { firstgid } = tileset;
                if (!tileset.source) {
                    // if there's no source, it means the Tileset
                    // is already embedded
                    return tileset;
                }

                // on my setup, stages are in root/stages/
                // and the tilesets are in root/tilesets/
                // so we need to remove "../tilesets/" from the path
                // and load it based on the root dir of the tilesets
                const filePath = tileset.source.replace('../tilesets/', '');
                // eslint-disable-next-line import/no-dynamic-require
                const tilesetData = require(`${TILESETS_PATH}/${filePath}`);
                if (!tilesetData) {
                    console.error('Could not find file', `${TILESETS_PATH}/${filePath}`);
                    return tileset;
                }

                return {
                    ...tilesetData,
                    firstgid,
                };
            });
            stageData.tilesets = newTilesets;

            return Buffer.from(JSON.stringify(stageData));
        },
    });
});

module.exports = {
    plugins: [
        new CopyWebpackPlugin({
            patterns: [
                ...copyWebpackPluginPatterns,
            ],
        }),
    ],
};
As you can see we need the copy-webpack-plugin plugin to make it work, by copying all maps from the assets/stages directory into the dist/assets/stages directory, and while copying it, we set a transform function that will load the individual external tilesets and embed them into the Tiled maps. Add this code to your Webpack config file if you want to achieve the same result.
Creating the title screen
This was actually quite easy and straightforward, specially because it’s pretty much the same code from previous Game Devlog.
First I load the map in the create function:
const map = scene.make.tilemap({ key: 'title_screen' });
const tileset = map.addTilesetImage('title_screen', 'city_tileset');
const { width, height } = this.cameras.main;

const background = map.createDynamicLayer('background', tileset, 0, 0);
const ground = map.createDynamicLayer('ground', tileset, 0, 0);
const foreground = map.createDynamicLayer('foreground', tileset, 0, 0);

[background, ground, foreground]
    .forEach((dynamicLayer) => {
        dynamicLayer.setY(
            height - background.height
        );

        // set this property to make the the layers move in different speeds
        dynamicLayer.setScrollFactor(dynamicLayer.parallaxSpeedX);
    });

// we're going to use that in the update function
this.parallaxCounter = 0;
Now all I did was move the camera till position y = 640, and from there reset the position back to y = 0, and the loop continues.
this.parallaxCounter += 1;
if (this.parallaxCounter === 640) {
    this.parallaxCounter = 0;
}

this.cameras.main.scrollX = this.parallaxCounter;
That’s all for today, I hope you liked it, if you do please leave it a comment and consider subscribing to my YouTube channel.
Tags:
- coding
- games
- javascript
- phaser
- phaser 3
- game devlog
- gamedev
- skate platformer
- super ollie vs pebble corp
- webpack
- tiled
Related posts
Post a comment
Comments
No comments yet.
