How to create a top-down RPG Maker like game with Phaser JS and React
From RPG Maker dreams to Phaser reality: a game dev journey.
Written in October 8, 2021 - 🕒 16 min. readMy first experience in “programming” started in 2002, when I was making games with RPG Maker, when I learned what a variable, data persistence, and loops were.
I never got to publish any of the games I made, but it was kind of always my dream so now that I have about 2 years of Phaser experience, I decided to make a small game in the same style as the RPG Makers I used to make. in 2002.
Integrating React with Phaser
Phaser works by rendering pixels inside a canvas element in the DOM, and it’s great, but one of the great features of web development is the power of the DOM and CSS to create great UI elements, and you can’t do that with Phaser alone.
The simplest way to use Phaser with React is with a functional component like the one below.
import React from 'react';
import Phaser from 'phaser';

function GameComponent() {
    const game = new Phaser.Game({
        ...configs,
        parent: 'game-content',
    });

    return <div id="game-content" />;
};

export default GameComponent;
Using React for the game UI
To make Phaser communicate back and forth with React, like to show a menu item or a dialog box, I will dispatch JavaScript events between Phaser and React.
The best way to do it would be with some sort of state management tool like Flux, but since this is just a very small project, dispatching JavaScript events will work for now.
// React component
function GameComponent() {
    const [messages, setMessage] = useState('');
    const [showDialogBox, setShowDialogBox] = useState(false);

    useEffect(() => {
        const dialogBoxEventListener = ({ detail }) => {
            setMessage(detail.message);
            setShowDialogBox(true);
        };
        window.addEventListener('start-dialog', dialogBoxEventListener);

        return () => {
            window.removeEventListener('start-dialog', dialogBoxEventListener);
        };
    });

    const handleMessageIsDone = useCallback(() => {
        const customEvent = new CustomEvent('end-dialog');
        window.dispatchEvent(customEvent);

        setMessage('');
        setShowDialogBox(false);
    }, [characterName]);

    return (
        <>
            {showDialogBox && (
                <DialogBox
                    message={message}
                    onDone={handleMessageIsDone}
                />
            )}
            <div id="game-content" />
        </>
    );
};

// Phaser scene
class GameScene extends Phaser.Scene {
    constructor() {
        super('GameScene');
    }

    create() {
        const dialogBoxFinishedEventListener = () => {
            window.removeEventListener('end-dialog', dialogBoxFinishedEventListener);
            // Do whatever is needed when the dialog is over
        };
        window.addEventListener('end-dialog', dialogBoxFinishedEventListener);
    }
}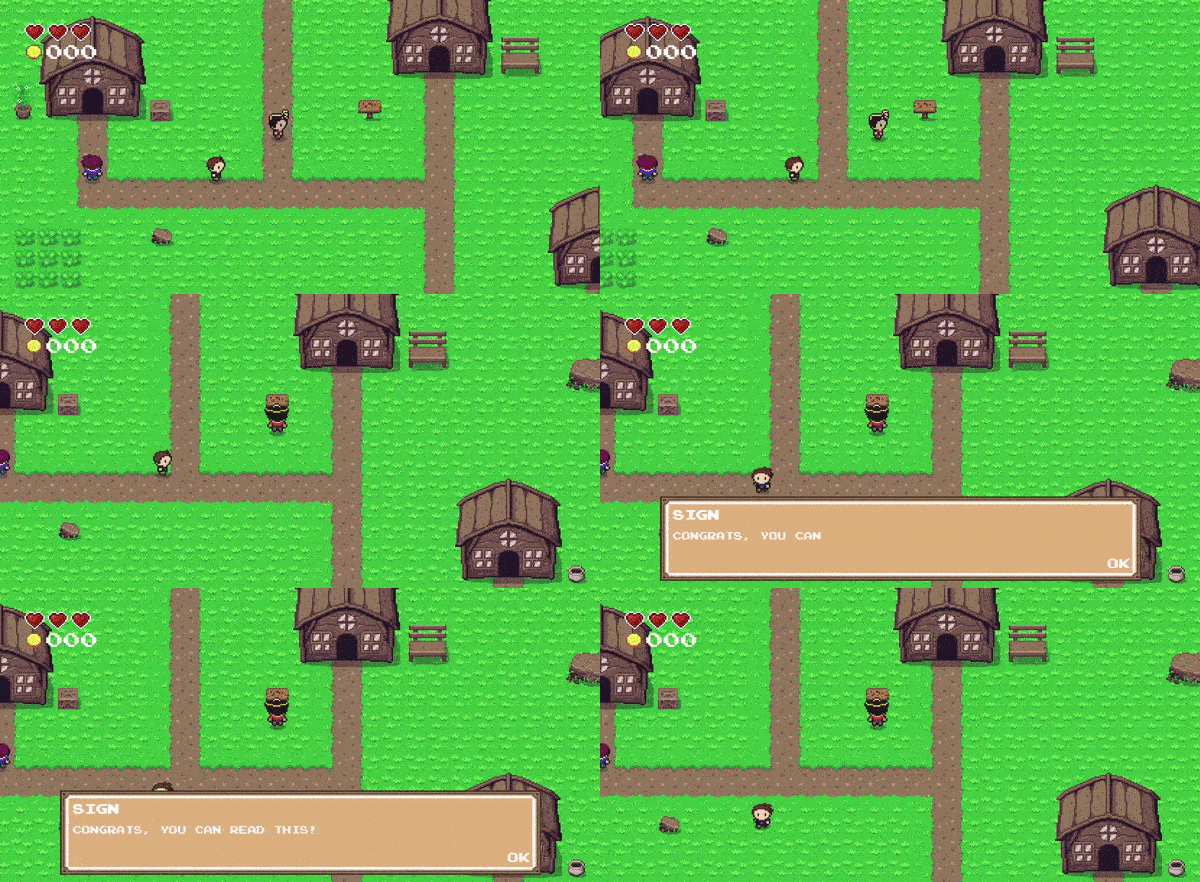
If you want more details on how to create a React dialog box for your Phaser game, check my blog post on it.
Using grid-engine and loading Tiled map
To create the map I will again use Tiled, which is a FOSS in which you can create maps and use them in almost any game engine.
The tileset I’m using for my map is the Zelda-like tileset created by ArMM1998, which includes indoor and outdoor tilesets.
After the map is done, I will embed the tileset into the map, and then I can simply import the map and tileset file into my game and load them in Phaser.
import mainMapaJson from '../../../content/assets/game/maps/main-map.json';
import tilesetImage from '../../../content/assets/game/maps/tileset.png';

class GameScene extends Phaser.Scene {
    constructor() {
        super('GameScene');
    }

    preload() {
        this.load.tilemapTiledJSON('main-map', mainMapaJson);
        this.load.image('tileset', tilesetImage);
    }
}
Now to add the grid-engine into Phaser, just configure your game to use arcade physics and add grid-engine as a plugin, like shown below.
const game = new Phaser.Game({
    ...configs,
    parent: 'game-content',
    physics: {
        default: 'arcade',
    },
    plugins: {
        scene: [{
                key: 'gridEngine',
                plugin: GridEngine,
                mapping: 'gridEngine',
            }],
    },
});
Now I can access the plugin via this.gridEngine inside any Phaser game scene. The next step is to create a sprite and move it with the grid-engine plugin.
create() {
    this.tileWidth = 16;
    this.tileHeight = 16;

    const map = this.make.tilemap({ key: 'main-map' });
    map.addTilesetImage('tileset', 'tileset');
    map.layers.forEach((layer, index) => {
        map.createLayer(index, 'tileset', 0, 0);
    });

    const heroSprite = this.physics.add.sprite(0, 0, 'hero');

    const gridEngineConfig = {
        characters: [{
            id: 'hero',
            sprite: heroSprite,
            startPosition: { x: 1, y: 1 },
        }],
    };
    this.gridEngine.create(map, gridEngineConfig);
}

update() {
    const cursors = this.input.keyboard.createCursorKeys();

    if (cursors.left.isDown) {
        this.gridEngine.move('hero', 'left');
    } else if (cursors.right.isDown) {
        this.gridEngine.move('hero', 'right');
    } else if (cursors.up.isDown) {
        this.gridEngine.move('hero', 'up');
    } else if (cursors.down.isDown) {
        this.gridEngine.move('hero', 'down');
    }
}
This code was pretty much copied and pasted from their official documentation page.
To make collisions work automatically with a map created on Tiled, just add the property ge_collide set to true for the tiles the hero is supposed to collide with.
Notice that this will make the hero move and collide with objects, but there is no walking animation. To create new sprite animations I will use the this.anims.create() function, and then play that animation every time the grid-engine tells me that the player moved, with the movementStarted, movementStopped and directionChanged events dispatched by the grid-engine.
create() {
    const heroSprite = this.physics.add.sprite(0, 0, 'hero');
    this.createHeroWalkingAnimation('up');
    this.createHeroWalkingAnimation('right');
    this.createHeroWalkingAnimation('down');
    this.createHeroWalkingAnimation('left');

    this.gridEngine.create(map, gridEngineConfig);
    this.gridEngine.movementStarted().subscribe(({ direction }) => {
        heroSprite.anims.play(direction);
    });

    this.gridEngine.movementStopped().subscribe(({ direction }) => {
        heroSprite.anims.stop();
        heroSprite.setFrame('down_01');
    });

    this.gridEngine.directionChanged().subscribe(({ direction }) => {
        heroSprite.setFrame('down_01');
    });
}

createHeroWalkingAnimation(direction) {
    this.anims.create({
        key: direction,
        frames: [
            { key: 'hero', frame: `${direction}_01` },
            { key: 'hero', frame: `${direction}_02` },
        ],
        frameRate: 4,
        repeat: -1,
        yoyo: true,
    });
}
Creating hero interactions
The hero must be able to interact with the world, for example going into an NPC and talking to them.
That sounds simple, but how to achieve that with Phaser? There are many ways to do it, but the easiest is to create a custom collider that will always be in front of the hero, and that custom collider will interact with all objects in the game.
First I’m going to create an object using the Phaser.GameObjects.Rectangle class:
this.heroActionCollider =
    new GameObjects.Rectangle(this, 0, 0, 14, 8).setOrigin(0, 1);
this.physics.add.existing(this.heroActionCollider);
this.heroActionCollider.body.setImmovable(true);
Now I need to make this custom collider always stay in front of the hero, for that I’m going to use the update function.
update() {
    const facingDirection = this.gridEngine.getFacingDirection('hero');

    switch (facingDirection) {
        case 'down': {
            this.heroActionCollider.setSize(14, 8);
            this.heroActionCollider.body.setSize(14, 8);
            this.heroActionCollider.setX(this.heroSprite.x + 9);
            this.heroActionCollider.setY(this.heroSprite.y + 36);

            break;
        }

        case 'up': {
            this.heroActionCollider.setSize(14, 8);
            this.heroActionCollider.body.setSize(14, 8);
            this.heroActionCollider.setX(this.heroSprite.x + 9);
            this.heroActionCollider.setY(this.heroSprite.y + 12);

            break;
        }

        case 'left': {
            this.heroActionCollider.setSize(8, 14);
            this.heroActionCollider.body.setSize(8, 14);
            this.heroActionCollider.setX(this.heroSprite.x);
            this.heroActionCollider.setY(this.heroSprite.y + 21);

            break;
        }

        case 'right': {
            this.heroActionCollider.setSize(8, 14);
            this.heroActionCollider.body.setSize(8, 14);
            this.heroActionCollider.setX(this.heroSprite.x + 24);
            this.heroActionCollider.setY(this.heroSprite.y + 21);

            break;
        }

        default: {
            // will never happen
            break;
        }
    }
}
Adding interactive tiles
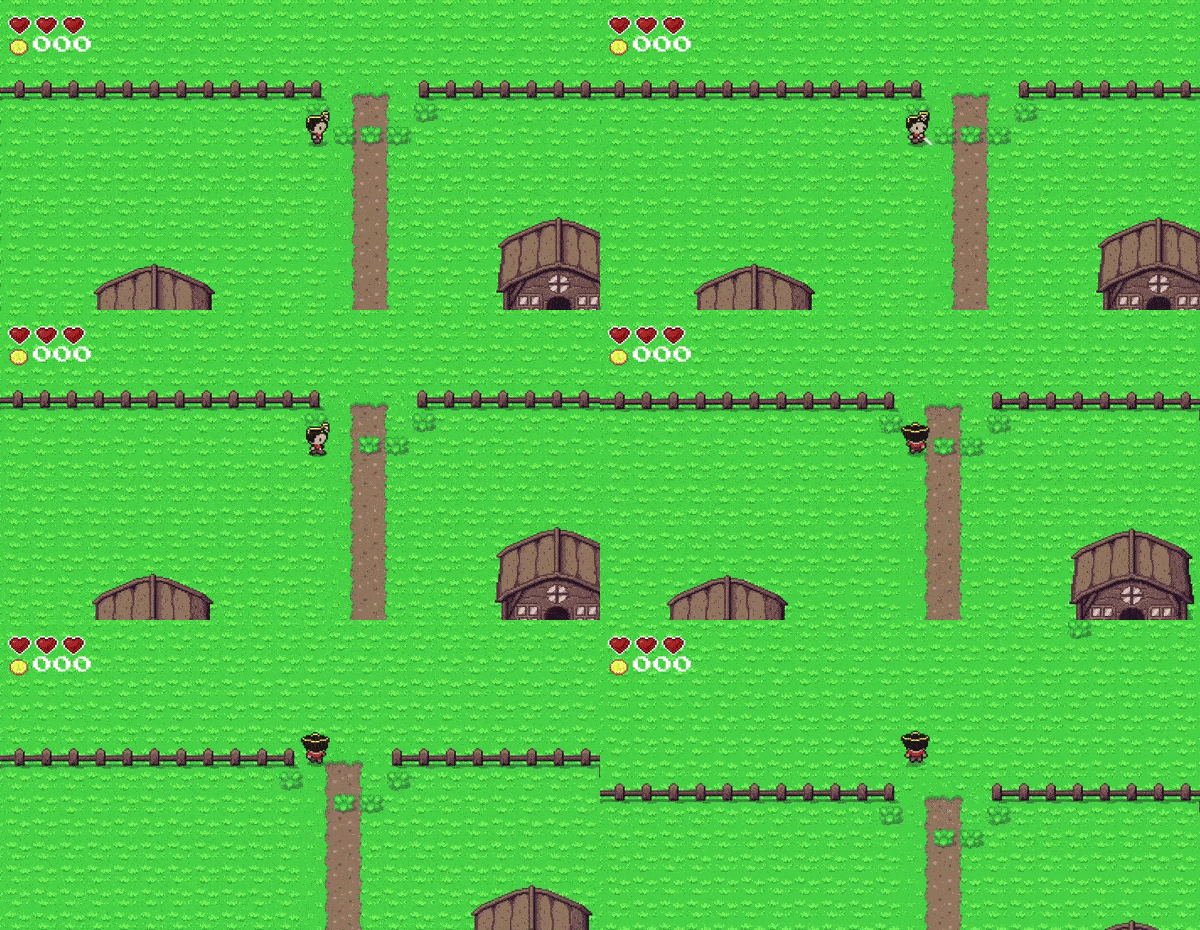
Now that I have the this.heroActionCollider variable, let’s make the world a bit more interactive. I want the hero to be able to cut grass and the push boxes, so first I will create a layer called test in my map and add the grass and box tiles.
map.layers.forEach((layer, index) => {
    map.createLayer(index, 'tileset', 0, 0);

    if (layer.name === 'test') {
        layer.data.flat().forEach((tile) => console.log(tile.index));
    }
});
In my case, my grass tile index is 428, and my box tile index is 427, and with this information, I can start coding my interactions.
First I will create a GameGroup with this.add.group() and add my interactive layers to it, and then create an overlap between this.heroActionCollider and interactiveLayers with the this.physics.add.overlap() function.
const interactiveLayers = this.add.group();
map.layers.forEach((layer, index) => {
    map.createLayer(index, 'tileset', 0, 0);

    if (layer.name === 'interactions') {
        interactiveLayers.add(layer);
    }
});

const GRASS_INDEX = 428;
const BOX_INDEX = 427;

this.physics.add.overlap(this.heroActionCollider, interactiveLayers, (objA, objB) => {
    const tile = [objA, objB].find((obj) => obj !== this.heroActionCollider);

    if (tile?.index > 0 && !tile.wasHandled) {
        switch (tile.index) {
            case GRASS_INDEX: {
                tile.wasHandled = true;
                break;
            }

            case BOX_INDEX: {
                tile.wasHandled = true;
                break;
            }

            default: {
                break;
            }
        }
    }
});
For the cutting grass action, I will check if the SPACE key is down with Input.Keyboard.JustDown(), and if it is, destroy that tile.
this.spaceKey = this.input.keyboard.addKey(Input.Keyboard.KeyCodes.SPACE);

this.physics.add.overlap(this.heroActionCollider, interactiveLayers, (objA, objB) => {
    const tile = [objA, objB].find((obj) => obj !== this.heroActionCollider);

    if (tile?.index > 0 && !tile.wasHandled) {
        switch (tile.index) {
            case GRASS_INDEX: {
                if (Input.Keyboard.JustDown(this.spaceKey)) {
                    tile.wasHandled = true;

                    // Wait a little bit for the attack animation to be over
                    this.time.delayedCall(
                        50,
                        () => {
                            tile.setVisible(false);
                            tile.destroy();
                        }
                    );
                }

                break;
            }
        }
    }
});
For the pushing box action, I will also check if the SPACE key is down, and then move the tile with this.tweens.add().
this.spaceKey = this.input.keyboard.addKey(Input.Keyboard.KeyCodes.SPACE);

this.physics.add.overlap(this.heroActionCollider, interactiveLayers, (objA, objB) => {
    const tile = [objA, objB].find((obj) => obj !== this.heroActionCollider);

    if (tile?.index > 0 && !tile.wasHandled) {
        switch (tile.index) {
            case BOX_INDEX: {
                if (Input.Keyboard.JustDown(this.spaceKey)) {
                    tile.wasHandled = true;
                    const newPosition = this.calculatePushedTilePosition();

                    this.tweens.add({
                        targets: tile,
                        pixelX: newPosition.x,
                        pixelY: newPosition.y,
                        ease: 'Power2',
                        duration: 700,
                        onComplete: this.handlePushedTileCompleted(tile),
                    });
                }

                break;
            }
        }
    }
});
This code contains 2 mysterious 🕵️ functions, calculatePushedTilePosition and handlePushedTileCompleted. The first one will calculate the new tile position after being pushed based on the hero position.
calculatePushedTilePosition() {
    const facingDirection = this.gridEngine.getFacingDirection('hero');
    const position = this.gridEngine.getPosition('hero');

    switch (facingDirection) {
        case 'up':
            return {
                x: position.x * this.tileWidth,
                y: (position.y - 2) * this.tileHeight,
            };

        case 'right':
            return {
                x: (position.x + 2) * this.tileWidth,
                y: position.y * this.tileHeight,
            };

        case 'down':
            return {
                x: position.x * this.tileWidth,
                y: (position.y + 2) * this.tileHeight,
            };

        case 'left':
            return {
                x: (position.x - 2) * this.tileWidth,
                y: position.y * this.tileHeight,
            };

        default:
            return {
                x: position.x * this.tileWidth,
                y: position.y * this.tileHeight,
            };
    }
}
The handlePushedTileCompleted function will remove the pushed tile and create a new one in the new position. This needs to be done because even though the tile position changed, the collision stays in the original position, I don’t know if this is by design or a bug on Phaser or in the grid-engine plugin.
handlePushedTileCompleted(tile) {
    const newTile = tile.layer.tilemapLayer.putTileAt(
        tile.index,
        newPosition.x / this.tileWidth,
        newPosition.y / this.tileHeight,
        true
    );

    newTile.properties = {
        ...tile.properties,
    };
    newTile.wasHandled = true;

    tile.setVisible(false);
    tile.destroy();
}
Adding enemies
To add enemies to the map, I will use Tiled objects layer, which I can access via the function map.getObjectLayer(). First I will create an object layer called elements and add some tiles with the “Insert Tile” button.
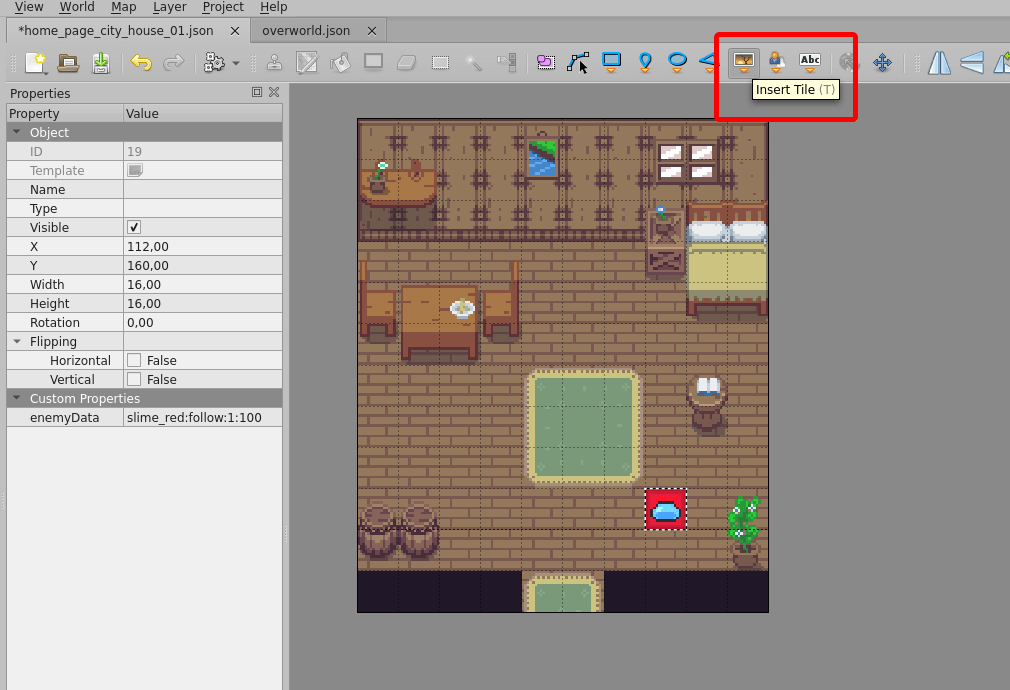
I will also add a custom property enemyData to this added tile with the value slime_red:follow:1:100, which will be all the properties of my enemy, this values separated by “:” are enemyType:AIType:speed:health. To get this values I will split the string and store all these data into an array to use later.
const enemiesData = [];
const dataLayer = map.getObjectLayer('elements');
dataLayer.objects.forEach((data) => {
    const { properties, x, y } = data;

    properties.forEach((property) => {
        const { name, type, value } = property;

        switch (name) {
            case 'enemyData': {
                const [enemyType, enemyAI, speed, health] = value.split(':');
                enemiesData.push({
                    x,
                    y,
                    speed: Number.parseInt(speed, 10),
                    enemyType,
                    enemySpecies: this.getEnemySpecies(enemyType),
                    enemyAI,
                    enemyName: `${enemyType}_${enemiesData.length}`,
                    health: Number.parseInt(health, 10),
                });

                break;
            }

            default: {
                break;
            }
        }
    });
});
Now the enemiesData variable contains all the data for all the enemies on the map, so all that is left is to create enemy sprites with this.physics.add.sprite() and add them to the gridEngineConfig.characters array.
this.enemiesSprites = this.add.group();
enemiesData.forEach((enemyData, index) => {
    const { enemySpecies, enemyType, x, y, enemyName, speed, enemyAI, health } = enemyData;
    const enemy = this.physics.add.sprite(0, 0, enemyType);

    if (enemyType.includes('red')) {
        enemy.setTint(0xF1374B);
    } else if (enemyType.includes('green')) {
        enemy.setTint(0x2BBD6E);
    } else if (enemyType.includes('yellow')) {
        enemy.setTint(0xFFFF4F);
    } else if (enemyType.includes('blue')) {
        enemy.setTint(0x00A0DC);
    }

    enemy.name = enemyName;
    enemy.enemyType = enemyType;
    enemy.enemySpecies = enemySpecies;
    enemy.enemyAI = enemyAI;
    enemy.speed = speed;
    enemy.health = health;

    this.enemiesSprites.add(enemy);

    gridEngineConfig.characters.push({
        id: enemyName,
        sprite: enemy,
        startPosition: { x: x / this.tileWidth, y: (y / this.tileHeight) },
        speed,
    });
});
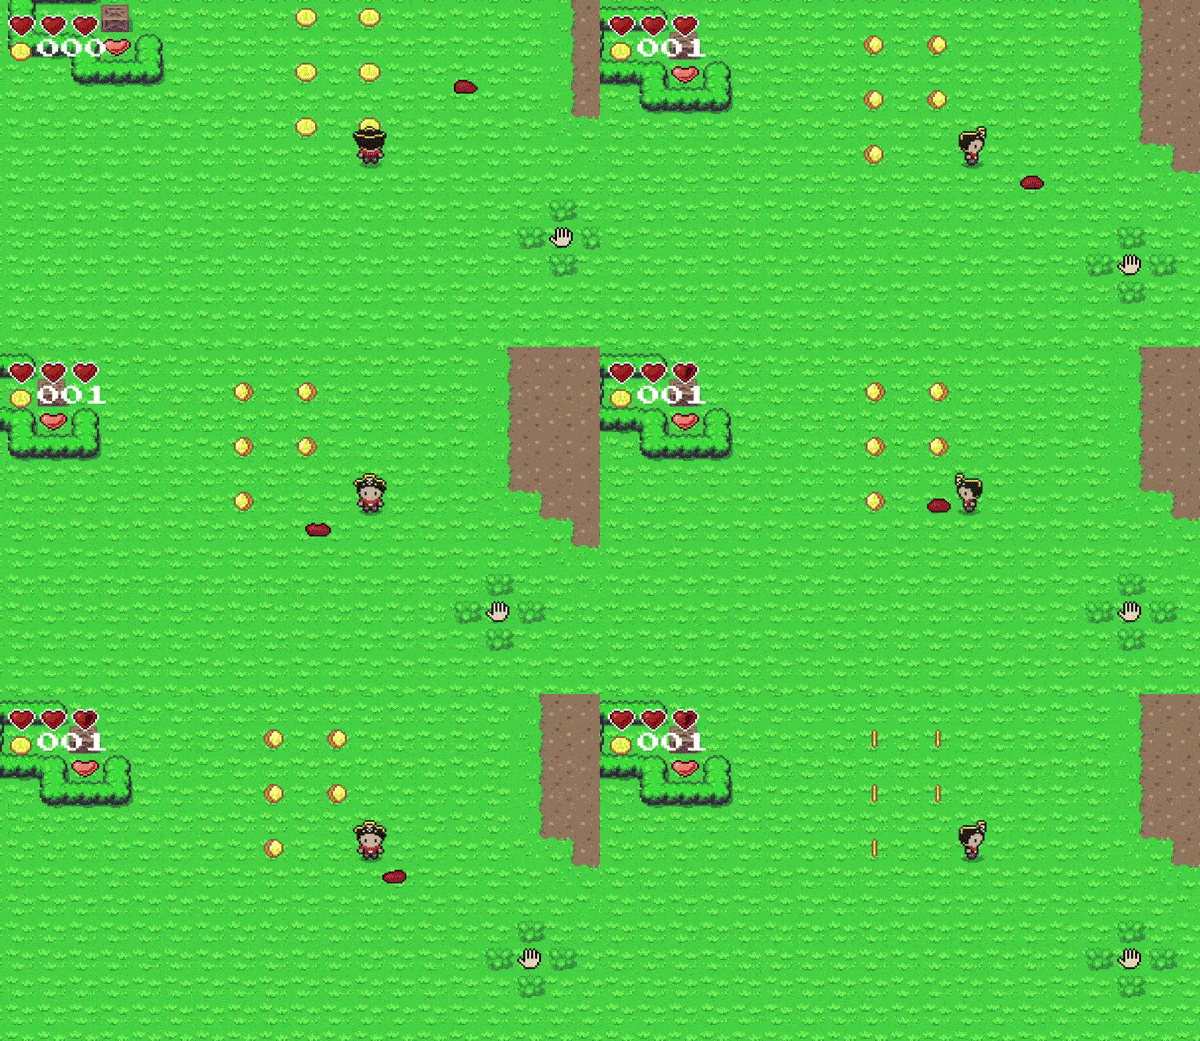
To make the enemy follow the hero, I will simply use the this.gridEngine.follow() function.
Adding items
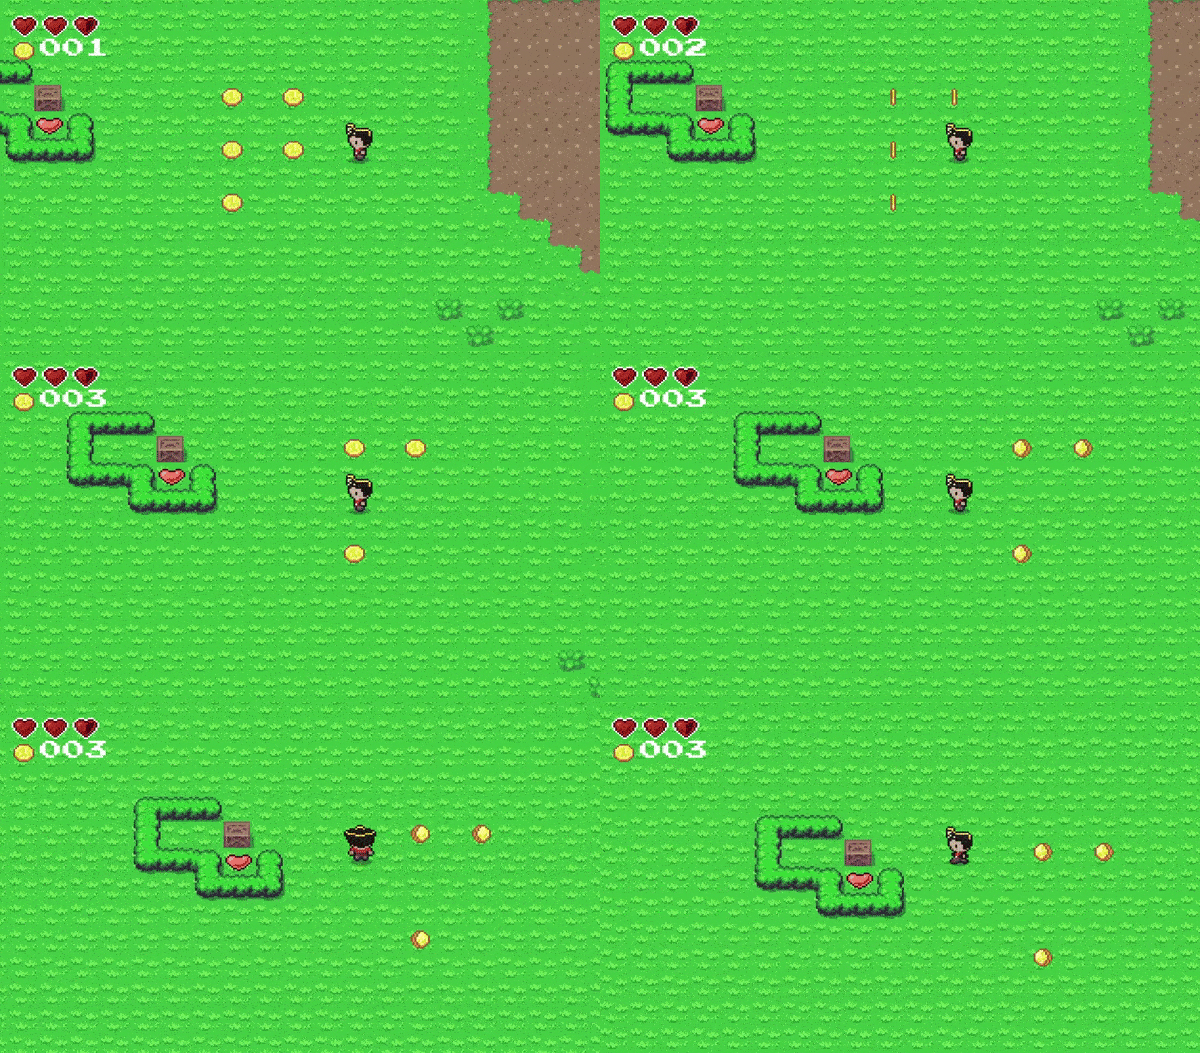
For the items I will again use the Tiled objects layer I already created, called elements. For now, I’m going to add two different items to the game, coins, and hearts, with a custom property called itemData.
this.itemsSprites = this.add.group();
const dataLayer = map.getObjectLayer('elements');
dataLayer.objects.forEach((data) => {
    const { properties, x, y } = data;

    properties.forEach((property) => {
        const { name, type, value } = property;

        switch (name) {
            case 'itemData': {
                // it's only one value... for now.
                const [itemType] = value.split(':');

                switch (itemType) {
                    case 'coin': {
                        const item = this.physics.add
                            .sprite(x, y, 'coin')
                            .setDepth(1)
                            .setOrigin(0, 1);

                        item.itemType = 'coin';
                        this.itemsSprites.add(item);
                        break;
                    }

                    case 'heart': {
                        const item = this.physics.add
                            .sprite(x, y, 'heart')
                            .setDepth(1)
                            .setOrigin(0, 1);

                        item.itemType = 'heart';
                        this.itemsSprites.add(item);
                        break;
                    }

                    default: {
                        break;
                    }
                }

                break;
            }

            default: {
                break;
            }
        }
    });
});
Now I just need to overlap the hero and the item group in the this.itemsSprites variable.
this.physics.add.overlap(this.heroSprite, this.itemsSprites, (objA, objB) => {
    const item = [objA, objB].find((obj) => obj !== this.heroSprite);

    if (item.itemType === 'heart') {
        this.heroSprite.restoreHealth(20);
        item.setVisible(false);
        item.destroy();
    }

    if (item.itemType === 'coin') {
        this.heroSprite.collectCoin(1);
        item.setVisible(false);
        item.destroy();
    }
});
Using React for the HUD
In the overlap code with the items, I didn’t explain how the restoreHealth and collectCoin functions work, as they communicate directly with React, so first let’s see what this component looks like.
The HUD component in React is quite simple and contains 3 props, an integer screenWidth, for the placement of the HUD on the screen, an integer coins, to show the amount of collected coins, and a healthState array, with the amount of hearts and whether they are empty, full or half.
import React from 'react';
import coinImage from '../images/coin.png';
import healthImage from '../images/health.png';

const useStyles = makeStyles((theme) => ({
    hudContainer: ({ screenWidth }) => {
        const left = window.innerWidth - screenWidth;
        return {
            fontFamily: '"Press Start 2P"',
            fontSize: '12px',
            textTransform: 'uppercase',
            imageRendering: 'pixelated',
            position: 'absolute',
            top: '16px',
            left: `${16 + (left / 2)}px`,
            display: 'flex',
            cursor: 'default',
            userSelect: 'none',
        };
    },
    health: () => ({
        width: '16px',
        height: '16px',
    }),
    healthStateFull: () => ({
        backgroundSize: '48px 16px',
        background: `url("${healthImage}") no-repeat 0 0`,
    }),
    healthStateHalf: ({ healthState }) => ({
        backgroundSize: '48px 16px',
        background: `url("${healthImage}") no-repeat -16px 0`,
    }),
    healthStateEmpty: ({ healthState }) => ({
        backgroundSize: '48px 16px',
        background: `url("${healthImage}") no-repeat -32px 0`,
    }),
    coin: () => ({
        backgroundSize: '16px 16px',
        background: `url("${coinImage}") no-repeat 0 0`,
        width: '16px',
        height: '16px',
    }),
    coinFull: () => {
        return {
            fontSize: '11px',
            textShadow: `-1px 0 #FFFFFF, 0 1px #FFFFFF, 1px 0 #FFFFFF, 0 -1px #FFFFFF`,
            color: '#119923',
        };
    },
}));

function GameHeadsUpDisplay({ screenWidth, coins, healthState }) {
    const classes = useStyles({
        screenWidth,
    });

    return (
        <div className={classes.hudContainer}>
            <div className={classes.healthContainer}>
                {healthStates.map((healthState, index) => (
                    <div
                        key={index}
                        className={classNames(classes.health, {
                            [classes.healthStateFull]: healthState === 'full',
                            [classes.healthStateHalf]: healthState === 'half',
                            [classes.healthStateEmpty]: healthState === 'empty',
                        })}
                    />
                ))}
            </div>
            <div className={classes.coinContainer}>
                <div className={classes.coin} />
                <span
                    className={classNames({
                        [classes.coinFull]: coins >= 999,
                    })}
                >
                    {coins.toString().padStart(3, '0')}
                </span>
            </div>
        </div>
    );
}

export default GameHeadsUpDisplay;
The code of the collectCoin function just sends a JavaScript event with the number of coins the hero has.
collectCoin(heroCoins) {
    const customEvent = new CustomEvent('hero-coin', {
        detail: {
            heroCoins,
        },
    });

    window.dispatchEvent(customEvent);
}
The restoreHealth function is a bit more complex, as it has to deal with the possibility of empty, full, and half hearts.
restoreHealth(healthToRestore) {
    const healthStates = Array.from({ length: this.heroSprite.maxHealth / 2 })
        .fill(null).map(
            (value, index) => {
                const health = Math.max(this.heroSprite.health - (2 * index), 0);
                if (health > 1) {
                    return 'full';
                }

                if (health > 0) {
                    return 'half';
                }

                return 'empty';
            }
        );

    const customEvent = new CustomEvent('hero-health', {
        detail: {
            healthStates,
        },
    });

    window.dispatchEvent(customEvent);
}
Well now that I’m looking at it again, it’s not that complex, but it took me a while to make everything work well.
So now my main GameComponent looks like the following with the HUD:
function GameComponent() {
    const [heroCoins, setHeroCoins] = useState(null);
    const [heroHealthStates, setHeroHealthStates] = useState([]);

    useEffect(() => {
        const heroCoinEventListener = ({ detail }) => {
            setHeroCoins(detail.heroCoins);
        };
        window.addEventListener('hero-coin', heroCoinEventListener);

        const heroHealthEventListener = ({ detail }) => {
            setHeroHealthStates(detail.healthStates);
        };
        window.addEventListener('hero-health', heroHealthEventListener);

        return () => {
            window.removeEventListener('hero-coin', heroCoinEventListener);
            window.removeEventListener('hero-health', heroHealthEventListener);
        };
    });

    return (
        <>
            <GameHeadsUpDisplay
                coins={heroCoins}
            />
            <div id="game-content" />
        </>
    );
};
Teleporting to another map
All the code done so far only works for one map, the main-map, however, my game has several maps, like houses, cities, and the overworld. Imagine having to copy all this code to other game scenes 😵.
Instead of doing that, I’m going to use the init() function of the Phaser.Scene class to pass information about the hero and which map to load in GameScene.
init(data) {
    this.initData = data;
}

create() {
    const { heroStatus, mapKey } = this.initData;

    const map = this.make.tilemap({ key: mapKey });
    map.addTilesetImage('tileset', 'tileset');
    map.layers.forEach((layer, index) => {
        map.createLayer(index, 'tileset', 0, 0);
    });

    const {
        position: initialPosition,
        health: heroHealth,
        coin: heroCoin,
    } = heroStatus;

    const heroSprite = this.physics.add.sprite(0, 0, 'hero');
    this.updateHeroHealthUi(heroHealth);
    this.updateHeroCoinUi(heroCoin);

    const gridEngineConfig = {
        characters: [{
            id: 'hero',
            sprite: heroSprite,
            startPosition: initialPosition,
        }],
    };
    this.gridEngine.create(map, gridEngineConfig);
}
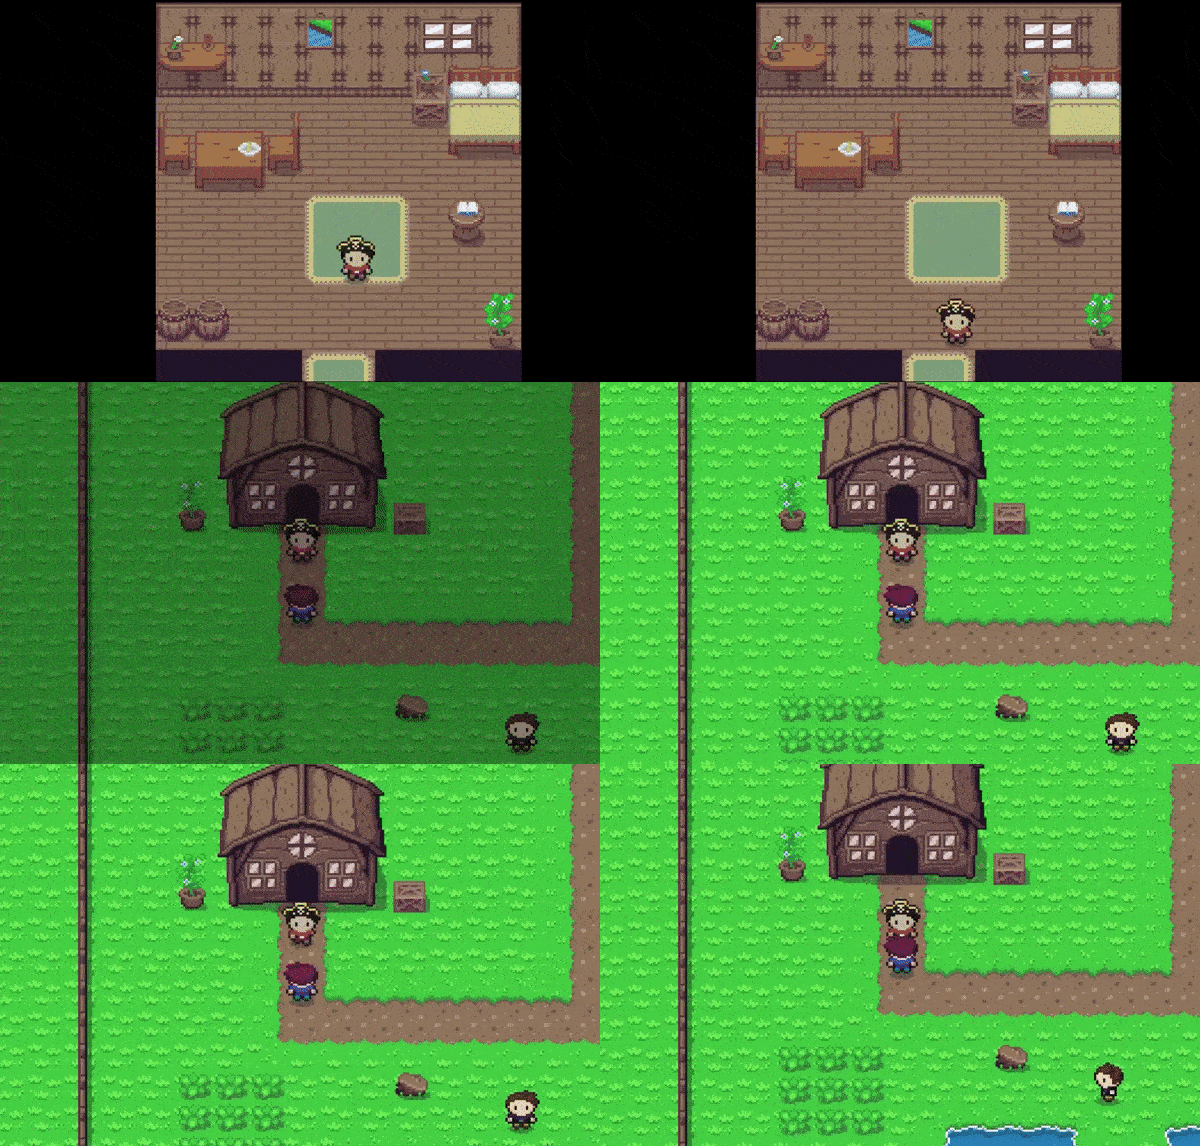
Now I can start my GameScene with the code this.scene.start('GameScene', { heroStatus: { ...heroStatus }, mapKey: 'main-map' });, and now I can start working on the code to teleport the hero between maps, and again I’m going to use Tiled’s object layer with a custom property named teleportTo with the value mapKey:positionX:positionY.
But what about starting the same game scene that you’re already in? For that there is the this.scene.restart() function. So I’m going to create a custom collider to collide with the hero and teleport, add a fade-out, and pass all the hero and new map data to this.scene.restart().
this.itemsSprites = this.add.group();
const dataLayer = map.getObjectLayer('elements');
dataLayer.objects.forEach((data) => {
    const { properties, x, y } = data;

    properties.forEach((property) => {
        const { name, type, value } = property;

        switch (name) {
            case 'teleportTo': {
                const [mapKey, teleportToX, teleportToY] = value.split(':');
                const customCollider = new GameObjects.Rectangle(this, x, y, 16, 16).setOrigin(0, 1);
                const SCENE_FADE_TIME = 300;

                const overlapCollider = this.physics.add.overlap(this.heroSprite, customCollider, () => {
                    this.physics.world.removeCollider(overlapCollider);
                    const facingDirection = this.gridEngine.getFacingDirection('hero');
                    camera.fadeOut(SCENE_FADE_TIME);

                    this.time.delayedCall(SCENE_FADE_TIME, () => {
                        this.scene.restart({
                            heroStatus: {
                                position: { x: teleportToX, y: teleportToY },
                                health: this.heroSprite.health,
                                coin: this.heroSprite.coin,
                            },
                            mapKey: teleportToMapKey,
                        });
                    });
                });

                break;
            }

            default: {
                break;
            }
        }
    });
});
Special thanks
This game would not be possible without the help of some amazing people and their work, so here is my list of special thanks.
- photonstorm, for creating Phaser.io.
- Annoraaq, for creating the grid-engine plugin.
- ArMM1998, for the characters sprites and tilesets.
- PixElthen, for the slime sprites.
- pixelartm, for the pirate hat sprites.
- jkjkke, for the Game Over screen background.
- KnoblePersona, for the Main Menu screen background.
- Min, for the open book sprite.
Conclusion
It was a lot of fun creating this small project. I actually made this game as a new way to access my blog, but with all this boilerplate code done, I might end up making a new game out of it, let’s see 👀.
There is more code into the “real” game than shown here in this blog post, so go check out the GitHub repo for this project.
See you in the next one!
Tags:
Related posts
Post a comment
Comments
No comments yet.
